From Notebook To Production Part 3
In part 2 we used Docker to run a Flask Application in a container. In this post we will use Kubernetes to host and scale that application, making the API hosted in the app available to anybody who wants to use it.
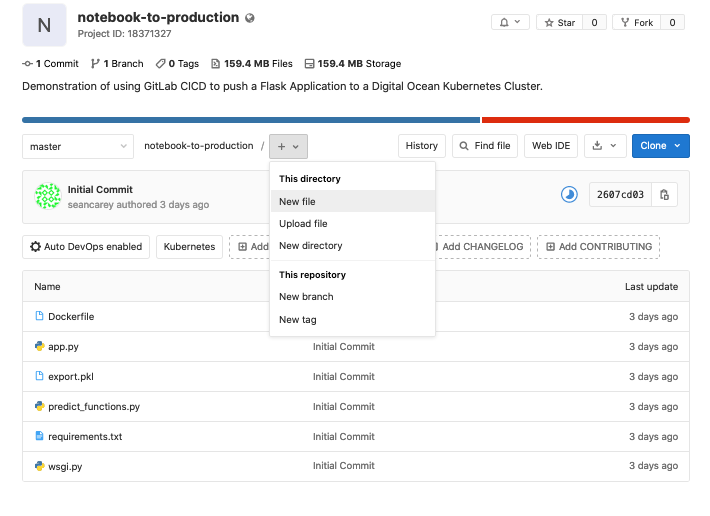
Put your code in a GitLab Repository.
Go to GitLab.com and create an account if you do not already have one.
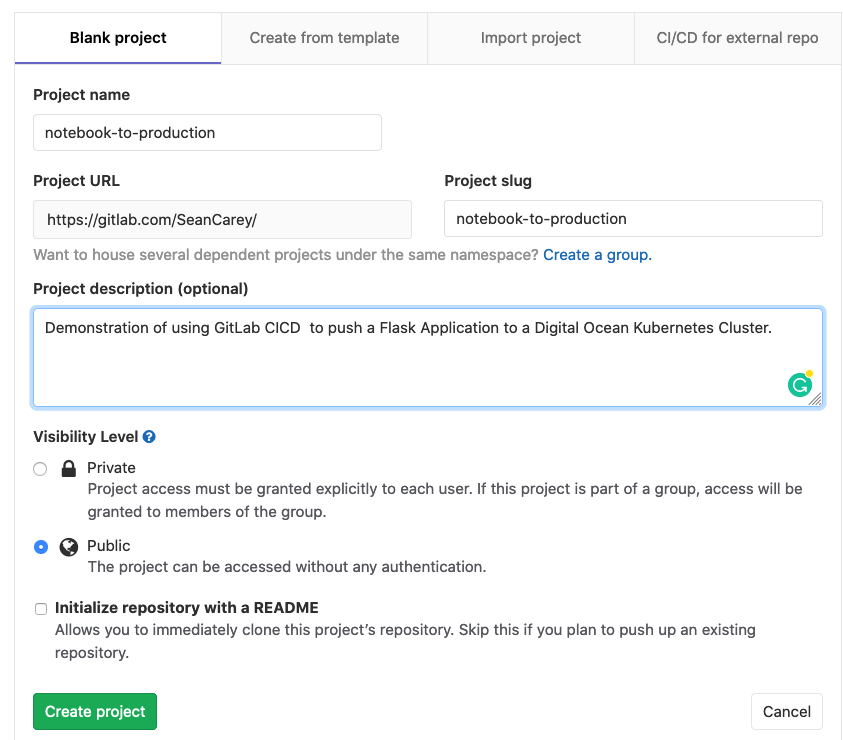
Once you are logged in, create a new project:
Clone the repository to your computer:
replace <USERNAME> with your Gitlab Username
git clone git@gitlab.com:<USERNAME>/notebook-to-production.git
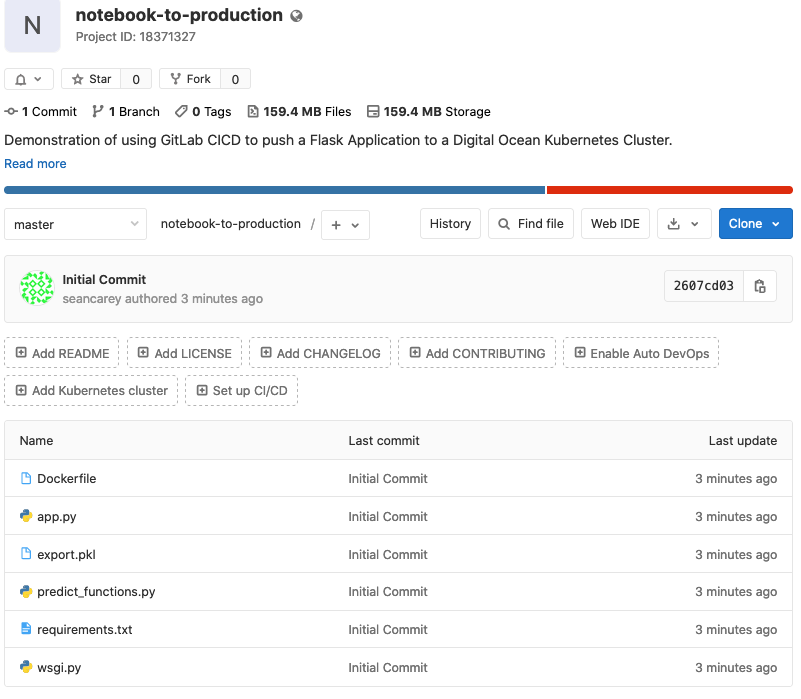
Copy the application files into the folder. Add them to Git with git add ., then commit and push the code to your GitLab Repo:
git add.
git commit -m "Initial Commit"
git push
Create a Kubernetes Cluster in the Digital Ocean Cloud
Following these steps on Digital Ocean will cost money
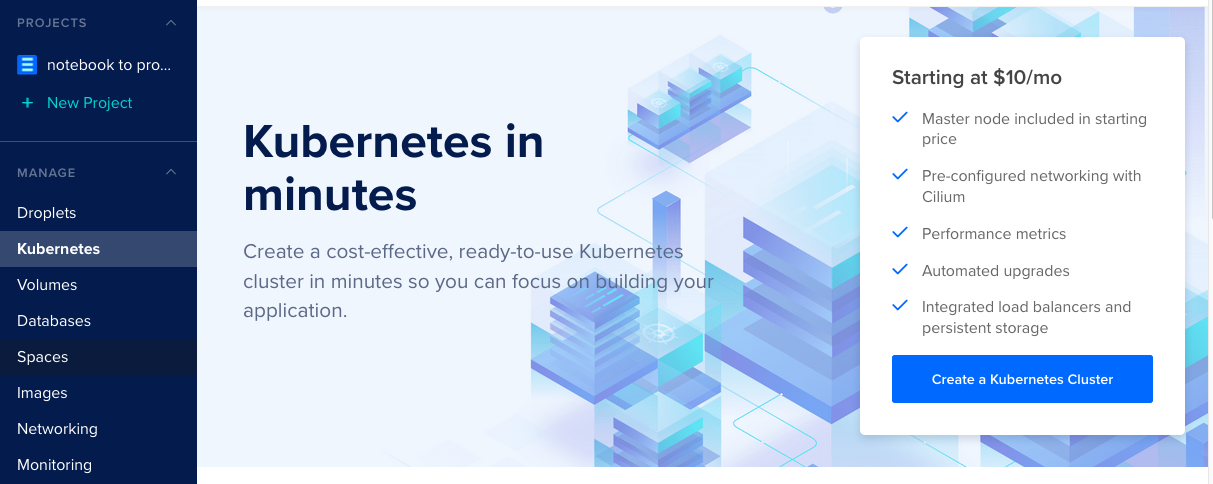
Create a Digital Ocean account and create a new project with your account.
Create Cluster
Inside of the new project, add a Kubernetes cluster:
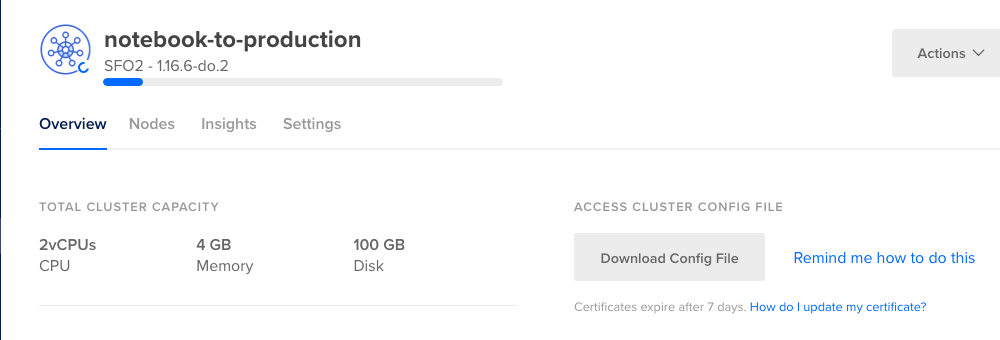
It will take a while for your Cluster to Initialize.
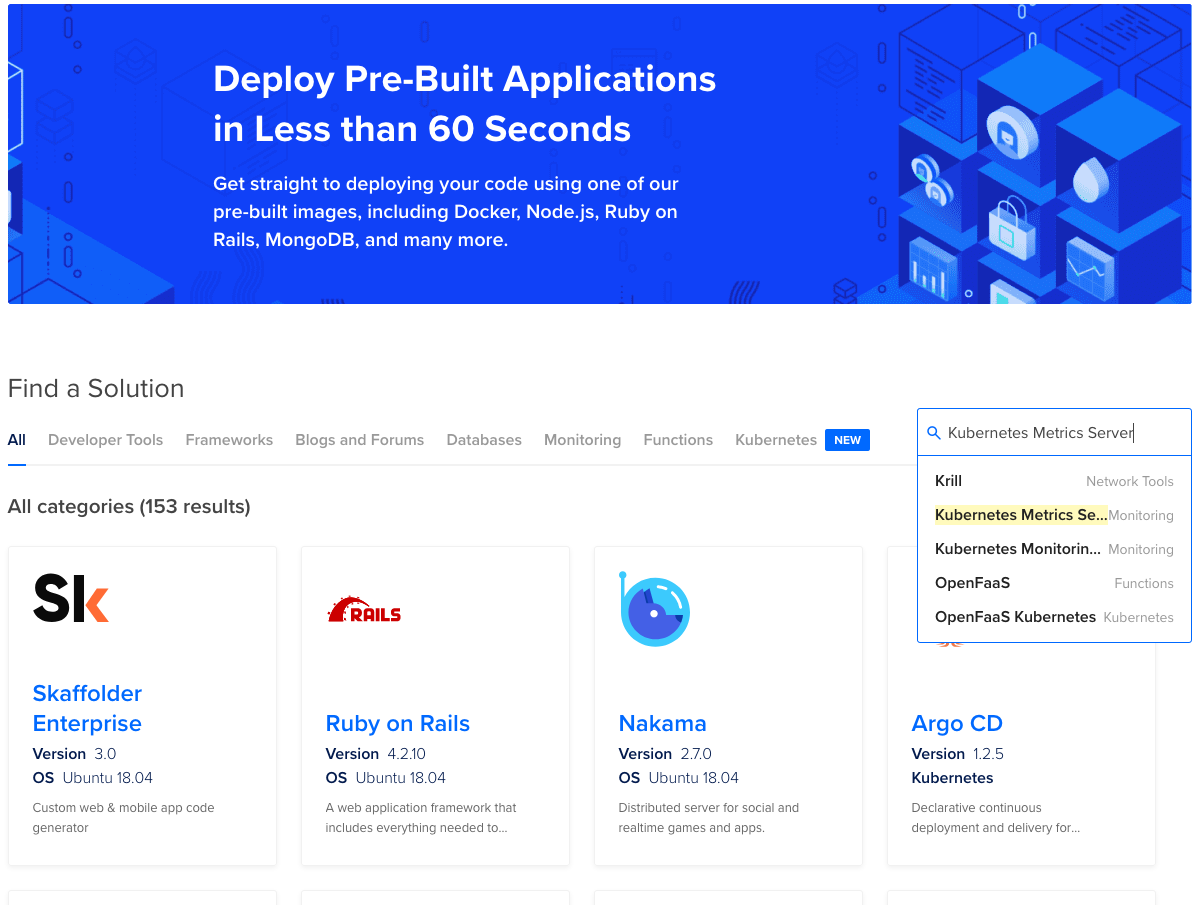
Install Metrics Server
We will need the metrics server to use Horizontal Pod Auto-scaling later on.
After your cluster is done initializing, select Marketplace from the menu on the left.
Search the marketplace for “Kubernetes Metrics Server”:
Select Install App then Install on Existing Cluster
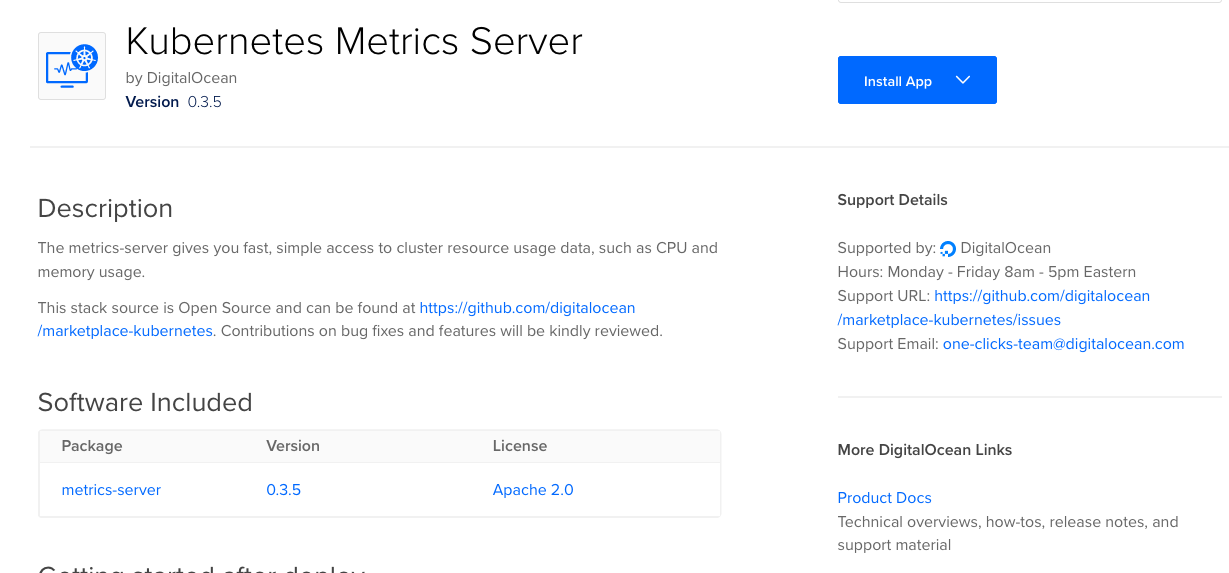
Select your cluster and install it.
This will install the metrics server on your Kubernetes Cluster.

Install kubectl
kubectl is the command-line tool for accessing your Kubernetes cluster and using the Kubernetes API. The official documentation from Google has great directions:
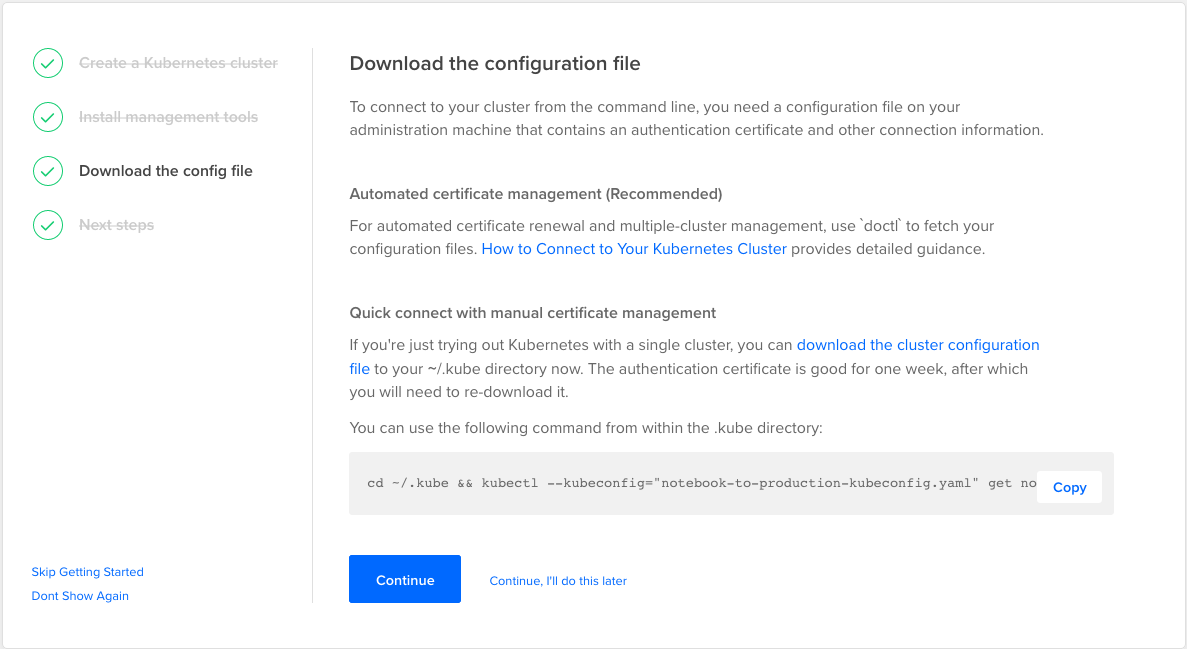
Download the kubeconfig
The kubeconfig is the configuration file that tells Kubectl how to talk to your Kubernetes cluster. To download the config file go to your Digital Ocean Kubernetes page:
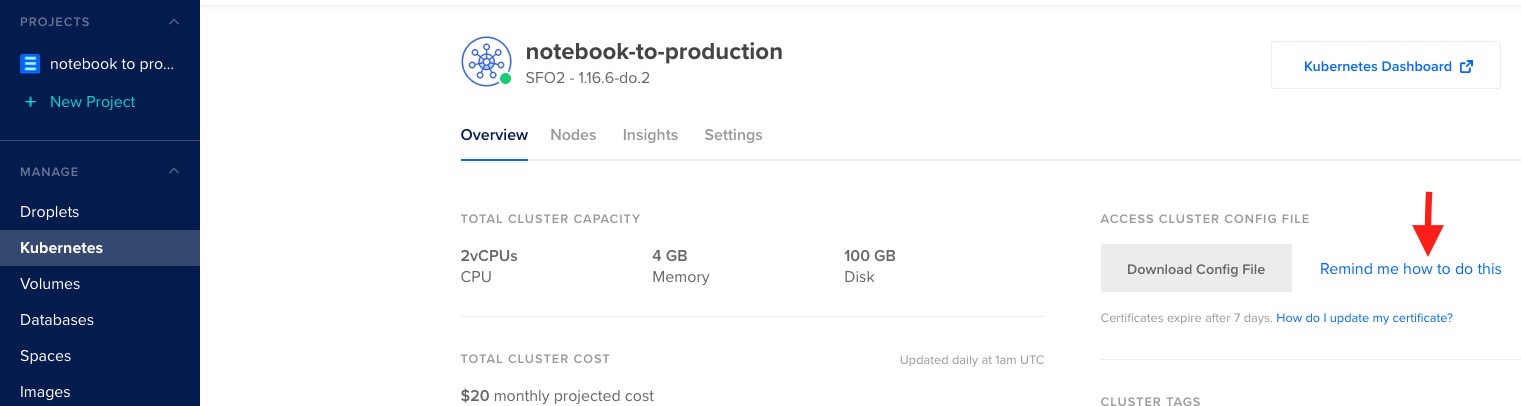
Select Download Config and follow the instructions in the Quick connect with manual certificate management paragraph.
The output for the command should look similar to this:

Now that we have kubectl installed and using the right config, we will integrate it with our GitLab project.
Create Gitlab Service Account and Cluster Role binding
Type the following commands into the terminal to create the accounts that GitLab will use to administer your cluster:
kubectl create serviceaccount --namespace kube-system gitlab-admin
kubectl create clusterrolebinding gitlab-cluster-rule --clusterrole=cluster-admin --serviceaccount=kube-system:gitlab-admin
The output will look something like this:

Integrate your Kubernetes Cluster with GitLab
Go back to your GitLab project page. Select Operations then Kubernetes from the left navigation bar. On the next page select Add Kubernetes Cluster
Then select Add existing cluster from the top. You should see a form that looks like this:
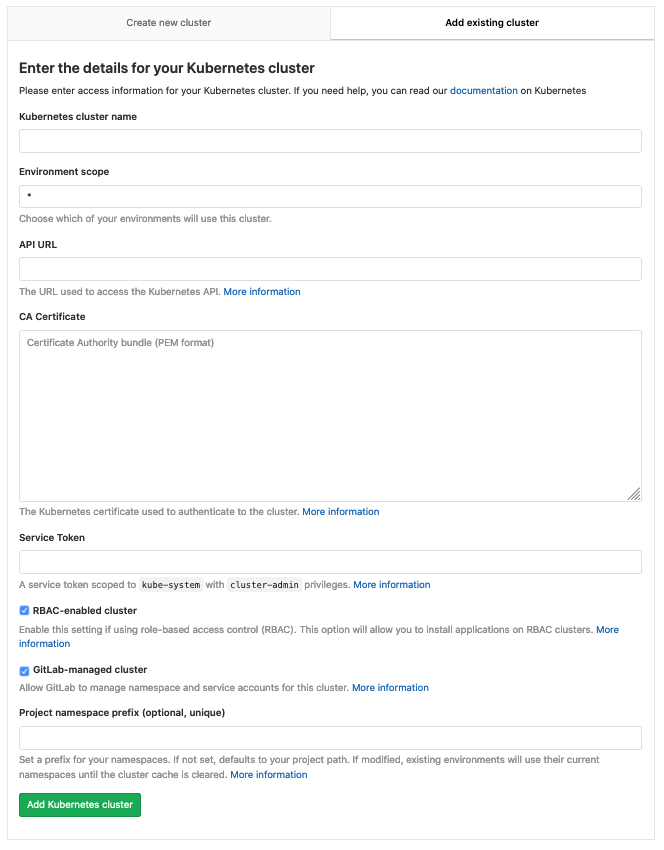
Let’s go field by field:
- Name: You can put whatever you want.
- Environment Scope: Leave it as default which should be
* - API URL:
- This info will come from your config file.
- Go to your command line and type:
kubectl config view - Copy the URL after the
server:key.

- CA Certificate:
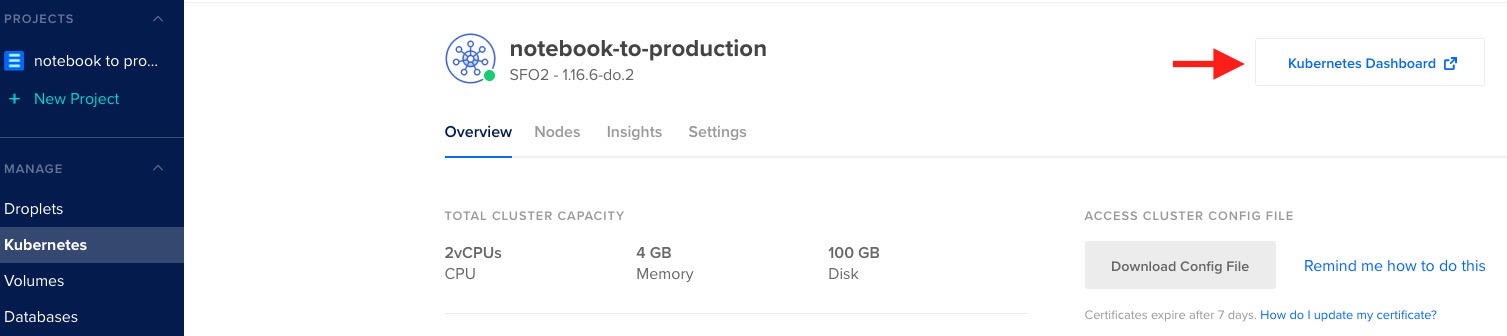
- Go back to your Kubernetes front page and select Kubernetes Dashboard
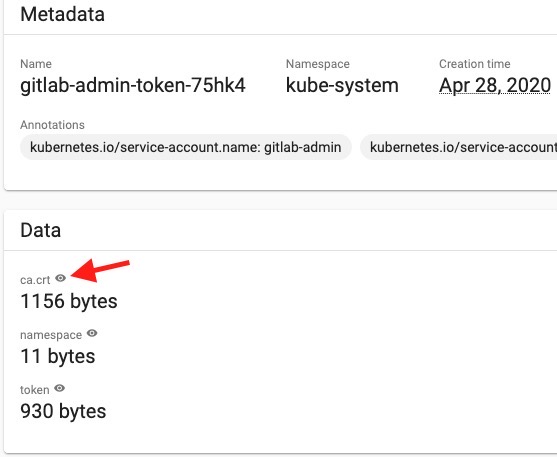
- In the Kubernetes Dashboard scroll down and select secrets

- Select the GitLab-Admin Token
- At the next screen select the eye next to the ca.cert. It should look something like this:
NOTE: This is not the actual value, portions have been redacted.
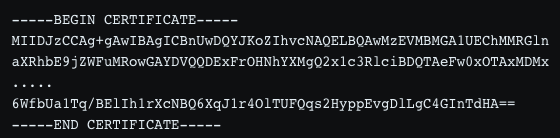
- Copy the contents of the box and paste it into the CA Certificate box
- Go back to your Kubernetes front page and select Kubernetes Dashboard
- Service Token
- Do the same thing as step 4 but copy the value from the token section instead of ca.cert
- Paste that value into the Service Token box.
- RBAC-Enabled: Leave this box checked.
- GitLab Managed Cluster: Leave this box checked.
- Project Namespace: Can be left blank.
Select Add Kubernetes Cluster
Kubernetes has been integrated with your GitLab project. A few more steps remain to make sure GitLab can deploy the application to this cluster.
Select Applications
We will need to allow GitLab to install some applications onto our Cluster.
First, install Helm/Tiller. This will allow us to install the other needed applications.
Install Ingress: This will create more virtual machines. This will cost money. However, the ingress is needed to deploy your application. This will expose your application to the internet and route requests to it. Likewise, it routes the application response back to the requesting host, outside of the cluster.
Install cert-manager: This will issue a certificate to the cluster applications. It will allow you to use https when making requests to the application.
When the applications are finished installing it should look like this:
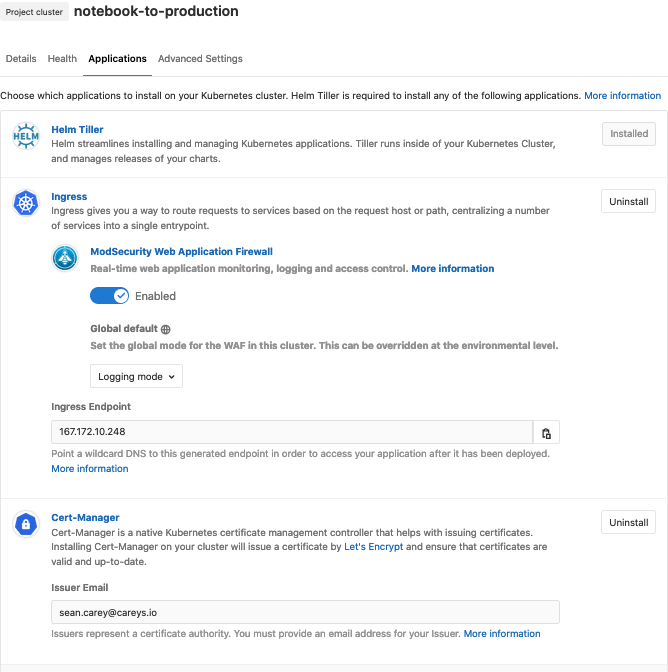
Select Details from the top. For the base domain, use the recommended value from the text below the box:
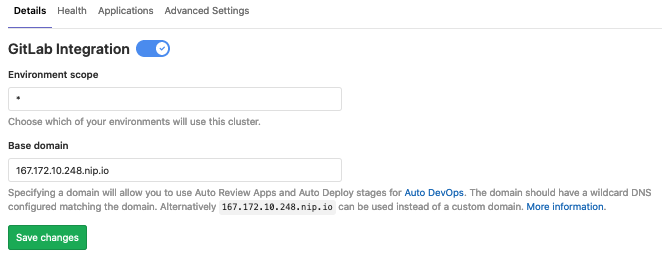
Your cluster is integrated and Ready for GitLab CICD to push apps.
Use GitLab CI/CD and Auto DevOps to push your application to your Kubernetes Cluster.
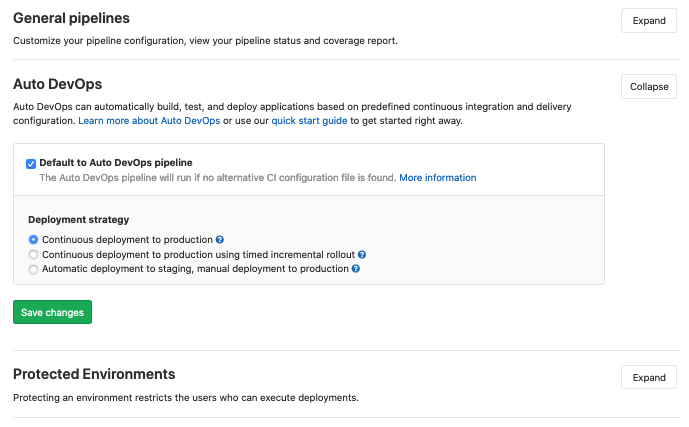
We will enable GitLab Auto DevOps and allow GitLab to deploy applications to our cluster.
-
Select to Settings then CICD from the left menu bar
-
Expand the Auto DevOps Section.
-
Check the box that says Default to Auto DevOps Pipeline
-
Save Changes
This will start a new DevOps Pipeline. It will more than likely fail. Don’t worry about this one. We are going to customize it a little bit.
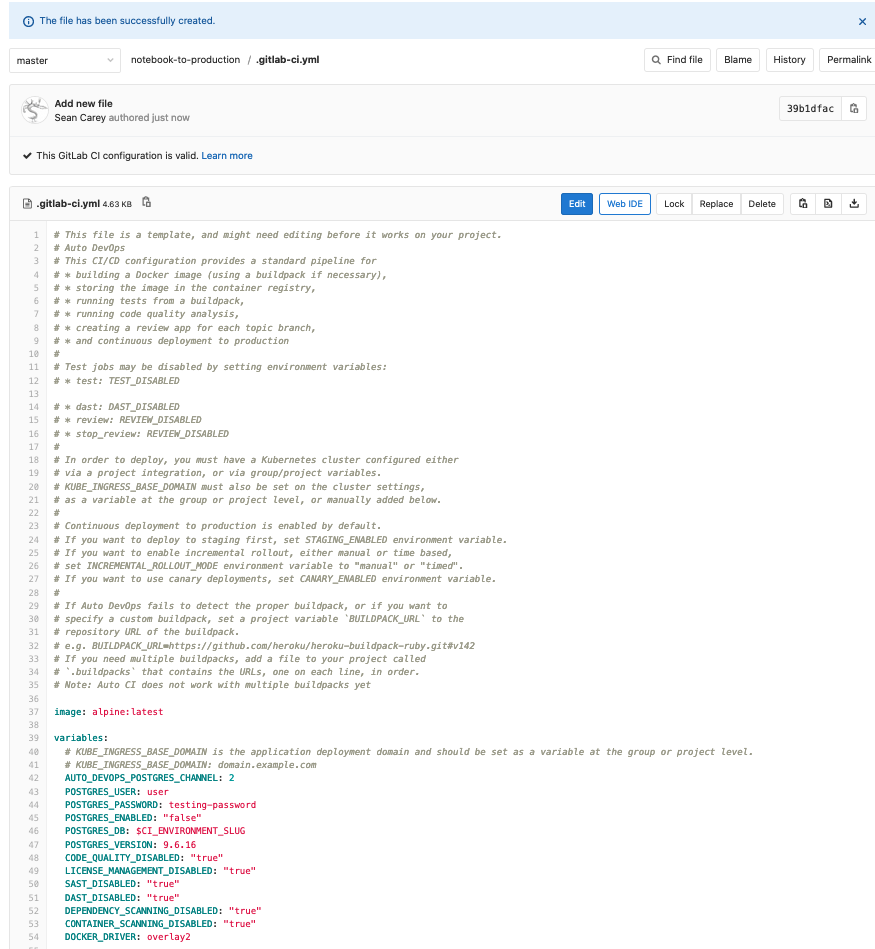
Configure .gitlab-ci.yml
The .gitlab-ci.yml file gives GitLab directions on how to deploy your application. AutoDev Ops probably works for most, but we want to customize things a little bit. To do this, we will add a new file called .gitlab-ci.yml.
Go back to your GitLab repository by selecting Project Overview from the left menu.
Use the Plus sign to add new file.
Name the file .gitlab-ci.yml
View this file, copy all of the contents into your the new file.
Commit the changes. You should get a screen that tells you the file is valid:
We have just one more file to configure to make sure this application will do everything we need.
Configure auto-deploy-values.yaml
Go back to your repository and use the plus sign to create a new directory named .gitlab
Inside that repository create a new file named auto-deploy-values.yaml
Copy all contents of this file into your new file. Save and Commit.
CICD Pipelines
GitLab will Build your application into a docker image, test it using the tests we build in Part 1, then deploy it into production. These actions are depicted visually via a Directed Acyclic Graph (DAG). To see this go to CICD then Pipelines form the left menu. There you will see some failed pipelines (that is okay) and one should be running from our previous commit.
This pipeline will take a while to run. Once it deploys into the cluster, the certificate could take another 30 minutes to an hour to issue. This should only happen the first time you deploy the application. We can work around having to wait for a certificate for the purposes of this walkthrough.
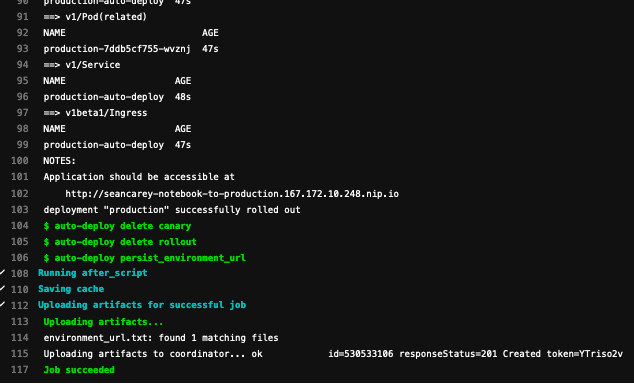
After 15 to 20 minutes, the pipeline should be finished:

What is each stage doing?
Build: Uses your dockerfile to build the docker image and pushes it to your GitLab Container Registry.
Test: Uses the tests and the test script we wrote in part one to perform unit tests.
Production: Pushes your application image to your Kubernetes Cluster.
Performance: tests the performance of your application while it is in production.
You can select any one of these objects in the graph and have a look at what it did.
Select the Production object:
Towards the bottom, you should be able to see the URL of your application:
Test API
Running this python script will send the payload to be classified by the API. It will send a response back.
import requests

# set the request URL
url = 'http://seancarey-notebook-to-production.167-172-10-248.nip.io/api'

# text to be classified by the model
payload = {"text": "The world's richest 1% have over twice the wealth of 6.9 billion people. \
        The planet will not be secure or peaceful when so few have so much and so many have so little.."}

# send request
# set verify=False while we are waiting for the certificate to be issued
res = requests.post(url, json=payload, verify=False)

# extract response json
data = res.json()

# print the model response
print(data)
The model predicts that the text represented by the payload variable is 94% Liberal. That isn’t a surprise as it is from the twitter account of Senator Bernie Sanders.
{'percent_in_class': 94.0, 'predicted_class': 'Liberal'}
Test Horizontal Pod Auto-Scaling
Kubernetes runs the flask application in a pod. Each pod contains one instance of the application. Using the Horizontal Pod Auto-Scaling feature of we can have the Cluster automatically add more pods of the app when the load increases to a certain level. We already set that feature up in when we created the auto-deploy-values.yaml file.
deploymentApiVersion: apps/v1


hpa:
  enabled: true
  minReplicas: 1
  maxReplicas: 10
  targetCPUUtilizationPercentage: 80


resources:
  limits:
    cpu: 500m
  requests:
    cpu: 200m
This configuration tells the cluster that we want to keep the CPU utilization below 80%. Kubernetes will deploy copies of the application to make sure the average CPU utilization of each pod is below 80%.
Let’s test the HPA configuration applied to this cluster.
First, get the namespace of your application. Kubernetes separates each deployment into separate namespaces as a way to keep different projects and users separated.
Enter this command in your command line to get a list of all of the namespaces on your cluster.
kubectl get namespace
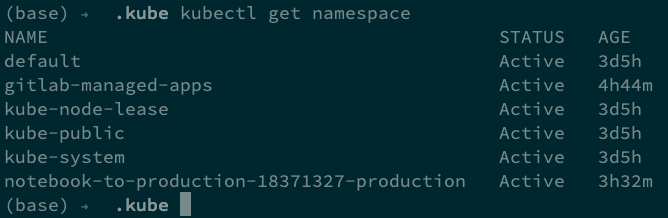
The namespace for my application is notebook-to-production-18371327-production
The HPA policy for a namespace can be viewed by sending the command:
kubectl view hpa --namespace=<YOUR NAME SPACE>

You can see that the current load is 0%, the Target load is 80%. The minimum number of pods is 1, the maximum number of pods is 10. Currently, only one Pod is running.
To simulate a heavy load, I will run this script in four terminals for a few minutes and see if HPA is working.
As the load increases, we should see the number of Replicas (copies of pods) change go up.
import requests

i = 1
while i < 10000:

    url = 'https://seancarey-notebook-to-production.167-172-10-248.nip.io/api'

    payload = {"text": "The world's richest 1% have over twice the wealth of 6.9 billion people. \
        The planet will not be secure or peaceful when so few have so much and so many have so little.."}

    res = requests.post(url, json=payload, verify=False)

    data = res.json()

    print(data)

    i += 1
The load quickly increases to 250%:

The cluster responds by adding three more pods of the application, notice the replica count is now 4. This brings the average CPU use below 80%:

As we remove the load, Kubernetes will eventually scale back down to the minimum number of pods set in the HPA configuration.
Wrap up
Now that we have GitLab deploying the application for us, all we need to worry about is out code. Anytime we push a code change to the Master branch of the repository, GitLab will push a new version of the application to replace the old one. You do not have to worry about building, testing, or deploying your application anymore.
Data Scientists can no longer live exclusively in their Jupyter Notebooks. Increasingly, employers expect a basic level of familiarity with DevOps and CICD practices. Why not add more skills to your toolbox and make your self more marketable. Broadening your technical toolset outside of your comfort zone is just as important as honing your soft skills.